I love beautiful books. I love all books, to be perfectly honest, but I especially love collecting unique, beautiful editions of my favorites.
So, when I saw a few examples on social media of people bedazzling their favorite books with rhinestones, I knew that I absolutely had to try it. I’ve never been a big rhinestone-girly, but who doesn’t love a little sparkle from time to time?
Why This Craft is Perfect for Book Lovers
I’m honestly so surprised that I had such a good time with this project. At first, I really thought that it had the potential to be tedious (at worst) and mildly entertaining (at best). But I actually really loved taking one of my favorite books and creating my own unique edition.
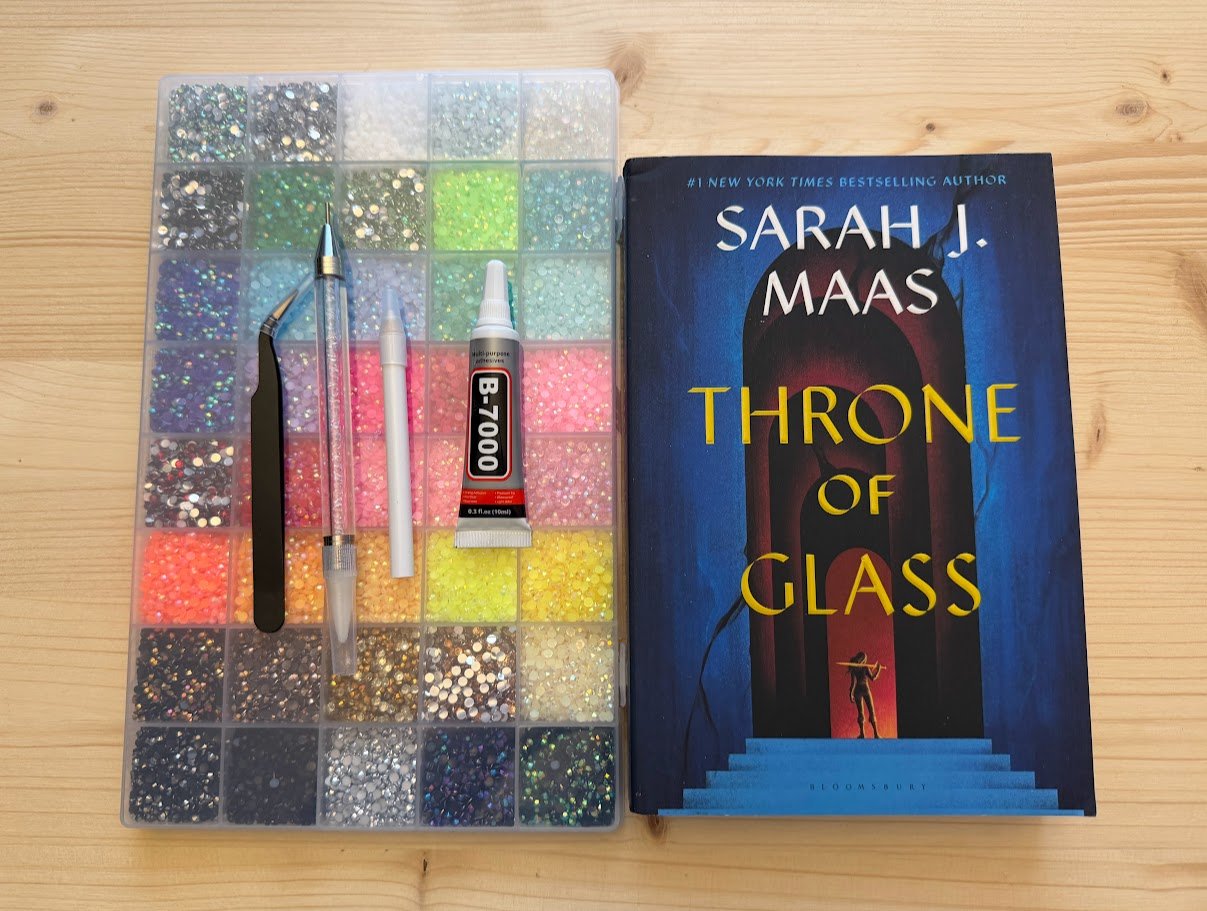
The list of supplies was fairly short, so it didn’t take a ton of money to get started. I did buy the rhinestone kit from Amazon, but it was relatively affordable. Bedazzling is very much a craft that requires specific supplies to get started, but many of those supplies will last a long time. The kit that I purchased for under $15 had 40,000 rhinestones!
I enjoyed this project because it was very beginner-friendly and didn’t really require any artistic skills to bedazzle. I was able to create a fun, beautiful product fairly easily.
I also found the process surprisingly relaxing, even meditative. Once I figured out what I was doing and settled into a rhythm, I was able to sit and work on it for hours while I listened to an audiobook. As someone with a very short attention span, that’s a big deal for me.
It was also really satisfying to watch the design slowly come together!
Affiliate Link Disclosure
This post may contain affiliate links. This means I may earn a small commission if you choose to purchase through my links, at no extra cost to you. I only share products I genuinely love or think you’ll enjoy.
Supplies You’ll Need
Before you begin, you’ll need a few supplies:
Essentials:
- Book (ideally paperback, but hardcover works too)
- Flat-back rhinestones (I used mainly 3mm, but then added some 2mm at the end)
- Glue (I used B-7000, which came in the kit)
- Wax picker tool
- Tweezers
- Small dish or tray
Optional:
- Pencil
- Ruler
- Painter’s tape
- Sealant
Before You Begin: Choosing the Right Book
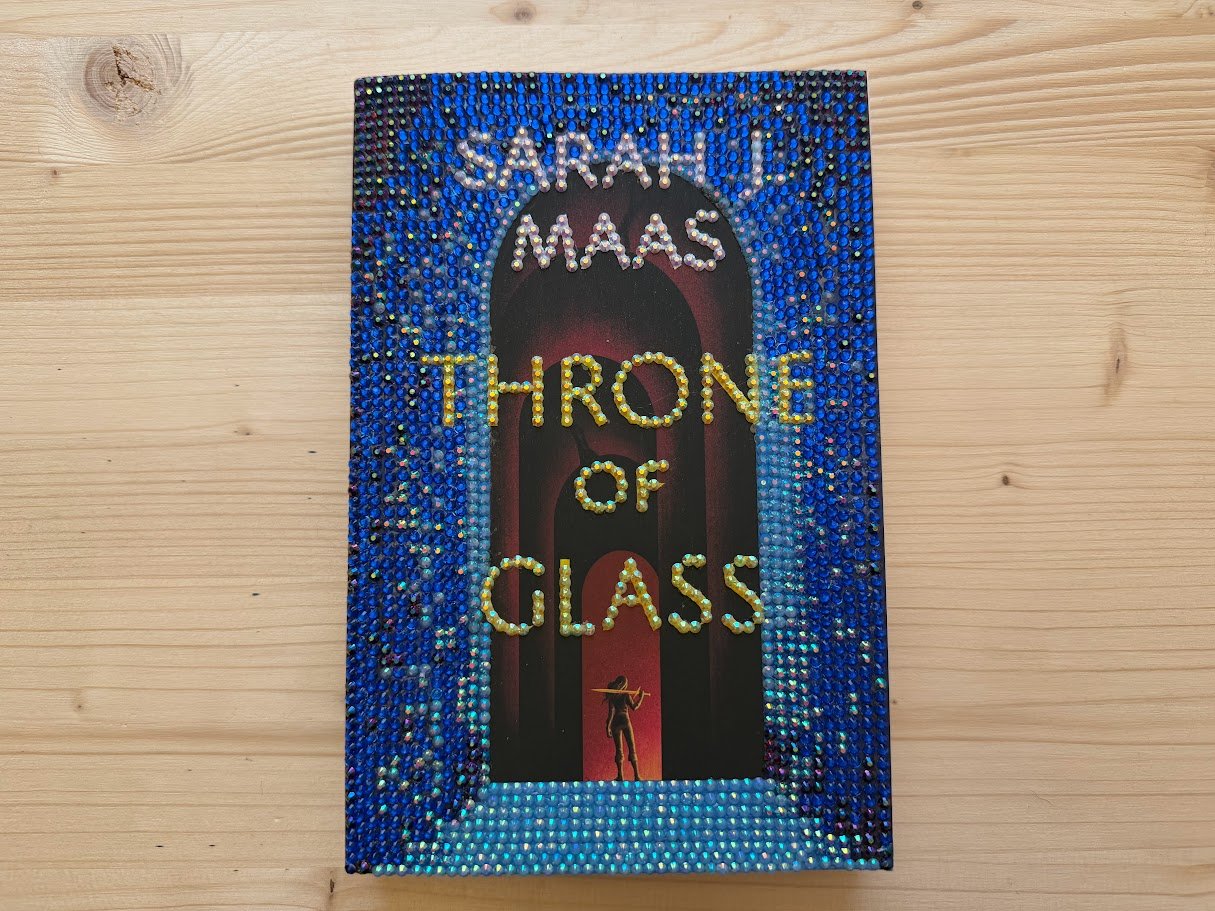
Before you dive right in, you’ll need to decide which book you want to bedazzle. For this project, I chose one of my favorites, Throne of Glass by Sarah J. Maas. If you haven’t read it, please, please, do. It will literally change your life.
I chose to use the paperback version of the book because it was readily available to me; I also felt less pressure about messing it up. In general, it’s fine to use the paperback or hardcover version of your book, but I do think that working with the paperback version is easier, especially for your first try. Paperbacks have a flat, sturdy cover that provides a great base for the glue, making it easier to use all the bright colors in the cover design and really make them stand out. Whereas hardcovers usually have a dust jacket that you would need to remove first.
When choosing the specific book to bedazzle, I would recommend one with a somewhat simple cover design. Though the process is relatively simple, it can take some time to get the hang of it, and you don’t want to get overwhelmed or frustrated by a complicated cover design.
Also, be mindful of both the number of different colors and how much you’ll need of each color. The book I chose, for example, was primarily blue, so I ended up using a ton of the blue rhinestones, more than came in the rhinestone kit. I actually had to order a separate, smaller packet to finish.
If you’re going to purchase a rhinestone kit to use (where you have a limited number of many colors), then I would suggest choosing a book that has several different colors on the cover. On the flip side, if you want to purchase individual rhinestone colors, I would recommend choosing a book with fewer colors you need to buy.
Step-by-Step Guide
Step 1: Decide on Your Design
Before you begin gluing anything, think about your design approach. You have a couple of different options:
Option 1: Full Coverage
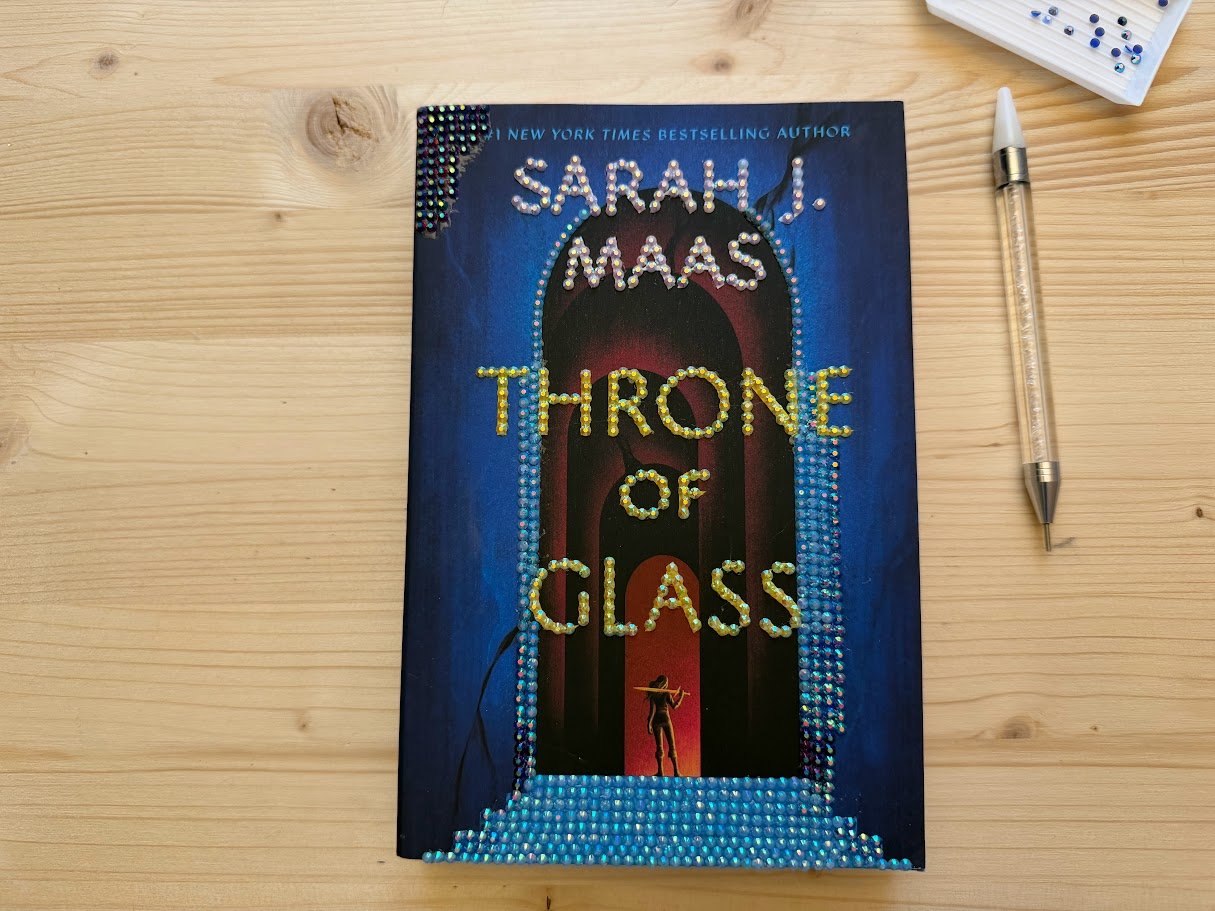
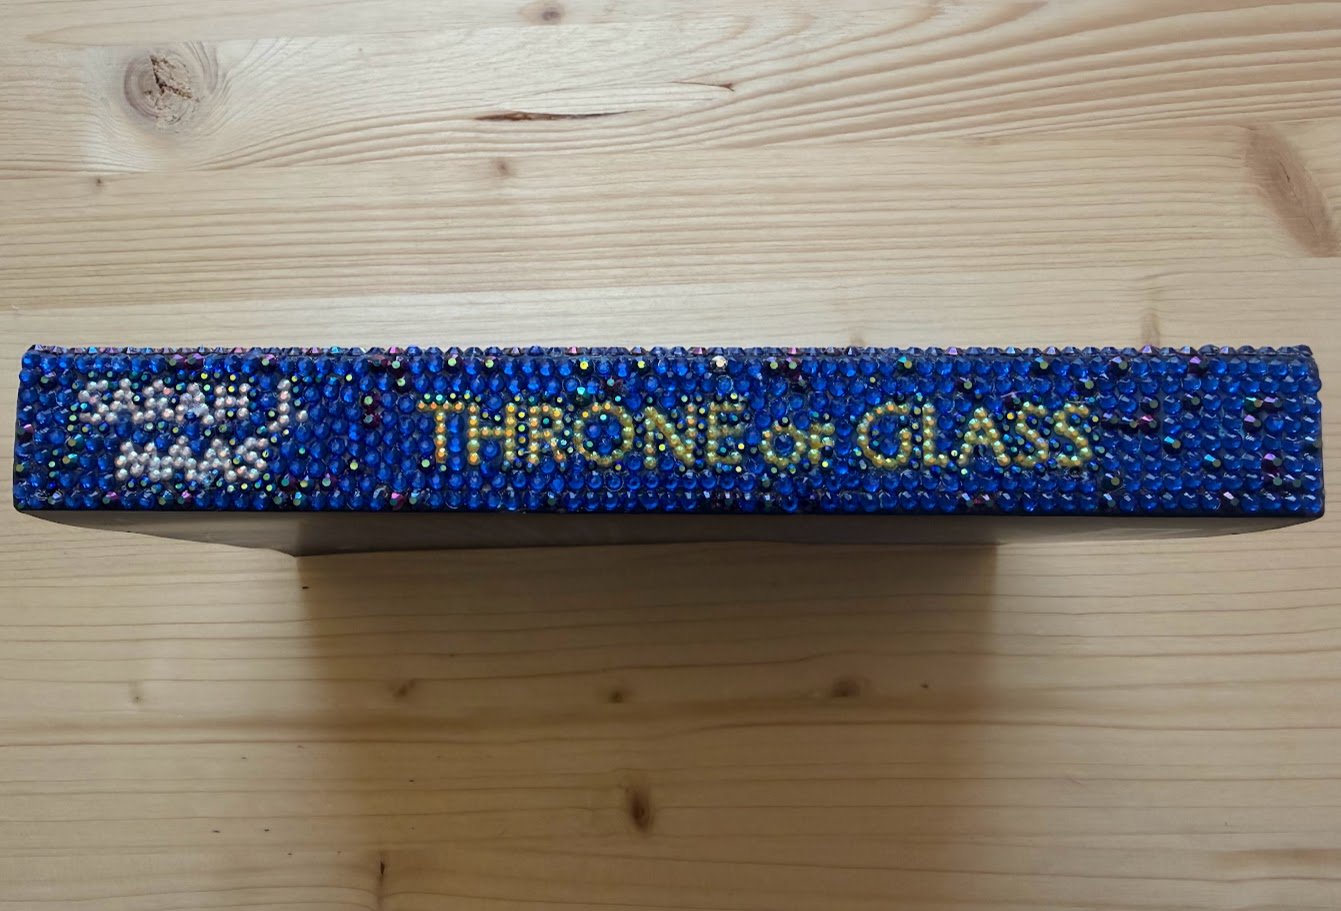
This involves covering the entire book cover (and, optionally, the spine) with rhinestones. This is the method I chose, and it led to a very pretty, dramatic result with maximum sparkle. The only negative was that it required more supplies and took more time than the other options.
Option 2: Design Accents
Instead of covering the entire book, you can choose to highlight specific elements like the title, any intricate details, decorative borders, or other symbols or illustrations. This method saves some time and supplies, but it is significantly less sparkly.
Option 3: Spine & Edges
This involves covering only the spine and edges, rather than the entire book. This is a good option if you plan to actually put the book in a bookcase where only the spine is visible.
Step 2: Prepare Your Workspace
Make sure that the cover is clean and free from any residue that might prevent the rhinestones from sticking properly. Then, you’ll need a flat work surface with really, really good lighting. I also used a small tray to pull out the rhinestones I was using, which kept things more organized.
This project can take many, many hours, so it’s really important that you have a comfortable place to sit and work as well!
Step 3: Apply Glue in Small Sections
I quickly learned to apply glue in small sections before adding the rhinestones. Working on one small area at a time kept the glue from drying out before I was finished. It also helped prevent mistakes because I could move the rhinestones around a little before they were cemented in place.
Step 4: Place the Rhinestones
Using the wax picker tool, I placed the rhinestones one at a time. At first, this felt extremely slow, but I eventually found a rhythm, and I kind of entered a meditative state. As I worked, I tried to keep the rows relatively straight and aligned when possible and fill any obvious gaps as needed.
Step 5: Keep Going and Adjust as Needed
You have to be very patient throughout this process, and it took me several hours over several days to complete the project. When it comes to this craft, slow and steady wins the race.
As I worked, I noticed a few things that made the process go more smoothly, and I adjusted my technique as I went.
For example, I realized that outlining the borders and edges first helped me keep everything straight and aligned. Once I had those guides in place, I was able to fill in the rest of the design more easily.
Also, I learned that sometimes the size of the rhinestones (I started with 3mm) just didn’t work very well with the design. I didn’t like how some of the rows didn’t align, so I eventually went back in with a slightly smaller rhinestone (2mm) to fill in any noticeable gaps.
Step 6: Let it Dry
Once all of the rhinestones were in place, I let it dry overnight. It was very difficult to wait to see the finished product, but it’s important to let the glue cure completely (24-48 hours) before moving it around too much.
Step 7: Clean it Up
I was a little messy with the wax and glue, so I needed to clean the book up a bit to make it as shiny as possible. Again, make sure that the glue is completely dry before doing this step! I would recommend waiting 24-48 hours.
To remove the wax residue, I carefully used a Q-tip dipped in rubbing alcohol to dab off the excess. Then, I gently wiped the tops of the rhinestones with a damp cloth.
For the excess dried glue strings, I primarily used my fingernail to gently rub in a small circle, which made the glue kind of ball up and roll away. Then I wiped the tops of the rhinestones with a damp cloth again.
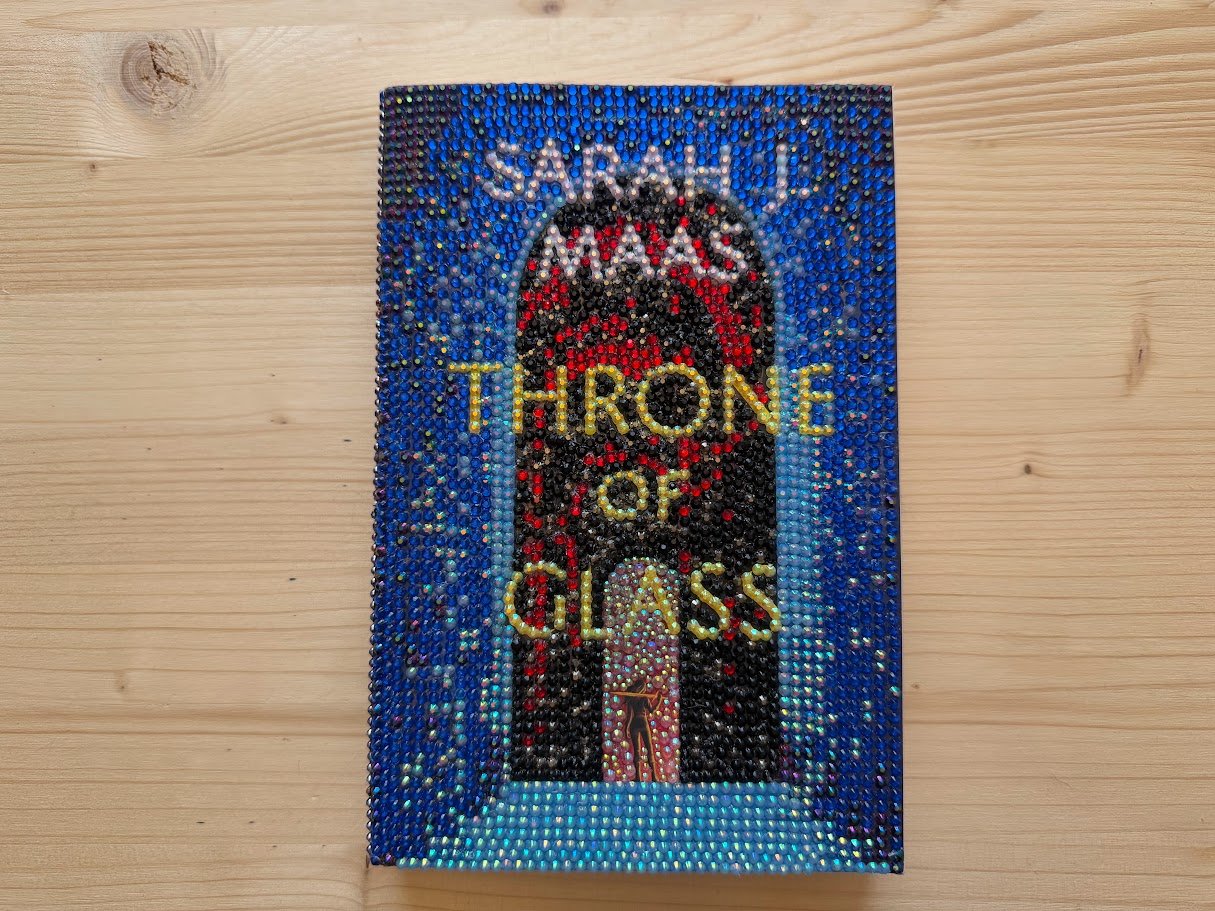
The Final Result
After everything was dried and cleaned up, I was so happy with how it turned out! Overall, I feel like it looks even better than I expected, and now I have a unique, customized version of a book I love so very much.
Last Tips
If you want to try this craft for yourself, here are a few things to keep in mind:
- Start with a simple design for your first time.
- Buy more rhinestones than you think you’ll need.
- Work in really, really good lighting.
- Organize all of your supplies before you begin.
- Don’t rush the process.
- Don’t strive for perfection.
Final Thoughts
I love creative hobbies like these because they encourage me to slow down and spend intentional time creating something beautiful.
With this project, I was able to transform a book that I already loved into something completely unique. I was reminded that creativity doesn’t have to be complicated, and joy can come in the form of some sparkles.